4.1新建工程及配置
1.新建工程及源码
1> 新建目录
$ mkdir hello
在applications/sample/hello中新建src目录以及helloworld.c文件,代码如下所示。
#include <stdio.h>

int main(int argc, char **argv)
{
    printf("\n");
    printf("\n\tHello OHOS!\n");
    printf("\n");

    return 0;
}
2> 新建编译组织文件
新建applications/sample/hello/BUILD.gn文件,内容如下所示:
import("//build/lite/config/component/lite_component.gni")
lite_component("hello-OHOS") {
  features = [ ":helloworld" ]
}
executable("helloworld") {
  output_name = "helloworld"
  sources = [ "src/helloworld.c" ]
}
新建的工程目录如下:
$ tree

2.添加新组件
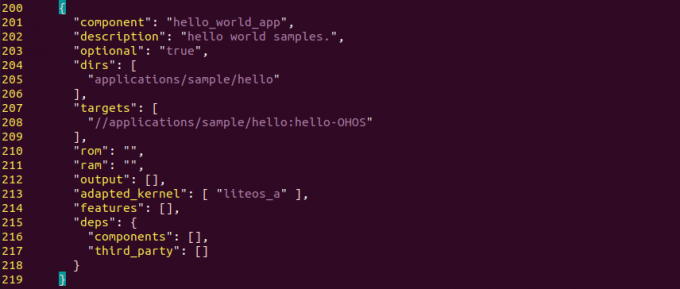
修改文件build/lite/components/applications.json,添加组件hello_world_app的配置。
 {
      "component": "hello_world_app",
      "description": "hello world samples.",
      "optional": "true",
      "dirs": [
        "applications/sample/hello"
      ],
      "targets": [
        "//applications/sample/hello:hello-OHOS"
      ],
      "rom": "",
      "ram": "",
      "output": [],
      "adapted_kernel": [ "liteos_a" ],
      "features": [],
      "deps": {
        "components": [],
        "third_party": []
      }
    }
3.修改单板配置文件
修改文件vendor/hisilicon/hispark_aries/config.json,新增hello_world_app组件的条目。
{
     "subsystem": "applications",
      "components": [
       { "component": "hello_world_app", "features":[] }
      ]
},
4.2编译下载验证
接下来就可以编译了。
$ hb set

全编译。
$ hb build -f

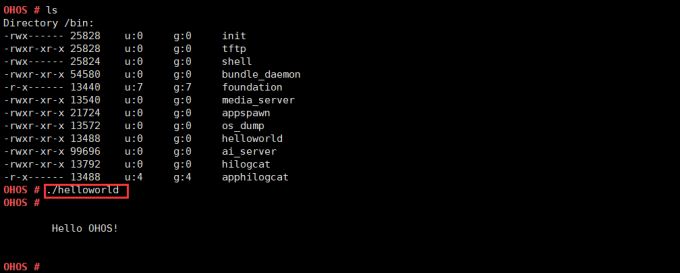
在bin文件就会有helloworld应用。

和以前一样,拷贝ohos_image.bin, rootfs_jffs2.img, userfs_jffs2.img三个文件是。
然后把固件下载到板子中。

烧写成功后,运行bin目录下的helloworld。
[
欢迎访问我的网站
BruceOu的哔哩哔哩
BruceOu的主页
BruceOu的博客
BruceOu的CSDN博客
BruceOu的简书
BruceOu的知乎
欢迎订阅我的微信公众号
关注公众号[嵌入式实验楼]获取更多资讯
