笔者将带领大家通过一个实例来学习Git的基本操作。
第一步:仓库初始化
在Repository/Git目录下点击右键->Git Bash Here
进入Git Bash
命令:git init –bare shared.git

如图表明初始化成功。
=================================开发人员1操作==============================
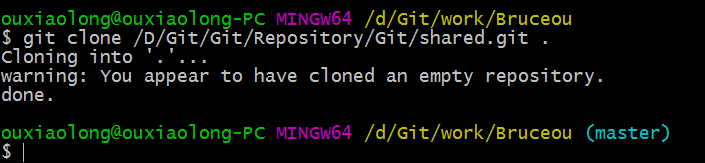
第二步:复制仓库到本地
命令:git clone /D/Git/Git/Repository/Git/shared.git . (注意有个点,表明当前目录)
第三步:设置个人信息
git config:
–system:操作/etc/gitconfig文件:包含了适用于系统所有用户和所有库的值。
–global:操作~/.git config文件:具体到你的用户
缺省:操作仓库.git/config文件
命令:
git config user.name "user1"//用户名
git config user.email user1@163.com//用户邮箱

用ls –al命令可以看到隐藏文件。如下图所示。

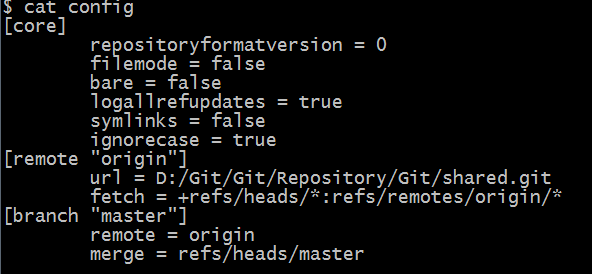
进入.git文件夹,查看配置文件。
命令:cat congfig
第四步:忽略无需版本控制的文档
命令:echo "*.txt" > .gitignore
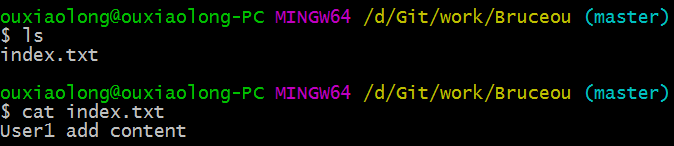
第五步:新建一个文件
命令:echo "User1 add content" > index.txt

查看是否添加成功。
第六步:提交文件
命令:
git add index.txt

命令:git commit
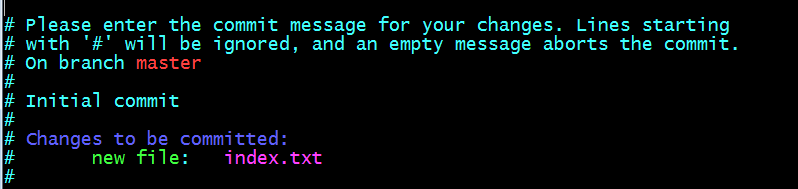
命令:首行添加:Bruceou add the file
保存退出,如下图表示成功。

第七步:把自己的仓库提交到公共服务器
命令:git push origin master

===============================开发人员2操作================================
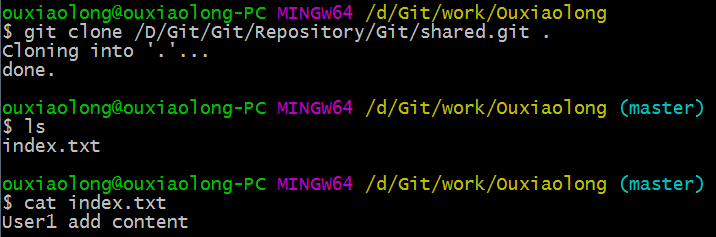
第八步:复制仓库到本地
命令:git clone /D/Git/Git/Repository/Git/shared.git .//本地克隆
命令:git clone git@github.com:用户名/仓库.git //远程克隆
第九步:设置个人信息
命令:
git config user.name "user2"
git config user.email user2@163.com

第十步:忽略无需版本控制的文档
命令:echo "*.txt" > .gitignore
第十一步:新建一个文件
命令:echo "User2 add content" >> index.txt

第十二步:提交文件
命令:git add index.txt

命令:git commit -m "Ouxiaolong add the file!"

第十三步:把自己的仓库提交到公共服务器
命令:git push origin master

查看状态:
命令:git status
===============================开发人员1操作================================
第十四步:下载服务器最新数据
git pull